English / Polski
About Laboratory / Mentor ADVANCED
Mentor ADVANCED
How does the language laboratory system work? Explore the lecturer’s interface, group work and the main audio controls.
Connecting workstations and audio
Mentor ADVANCED combines Mentor hardware and software for managing a language laboratory. From the lecturer’s computer, participants can be organised into groups, audio material can be routed to them, and headphones and microphones can be controlled.
This guide is based on the v4.9.5.7 manual (2024). The screenshots contain the manufacturer’s demonstration data. Available functions depend on the software version, equipment and enabled packages; confirm the setup in Room 205 with the Head of the Laboratory.
Three areas of the main window
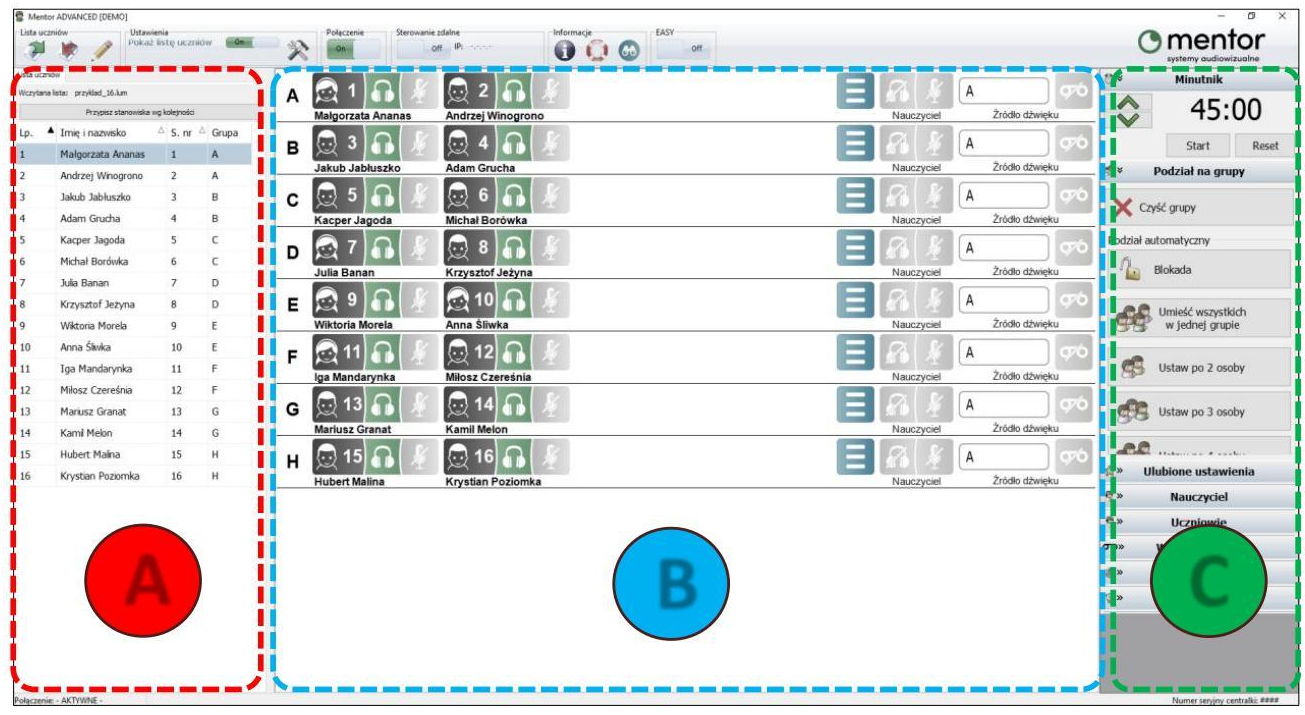
| Area | What the lecturer does |
|---|---|
| A · Participant list | Load a list and check the workstation numbers assigned to participants. A participant needs an assigned workstation before joining a group. |
| B · Workspace | Create groups, move participants and check headphones, microphones and the audio source. |
| C · Settings panel | Choose pairs, groups of three or four, manage audio and saved layouts, and use the timer. |
A session, step by step
- Prepare the workstations. Start the system as shown during your induction, check its connection to the central unit and test the headsets at a comfortable volume.
- Load the list and check station numbers. Make sure assignments match where participants are actually sitting.
- Create groups. Drag a participant from the list to the workspace, or choose automatic pairs, groups of three or four.
- Select an audio source. Assign material to the relevant group and check that participants can hear it.
- Run the task and give feedback. Enable the required microphones and headphones. The lecturer can join a selected group and listen to one group at a time.
- Finish and secure the materials. Stop playback or recording, save material only in the agreed location and leave the workstation ready for the next group.

Recording and playback in EASY mode
EASY mode presents frequently used functions in a simplified panel. The manual describes direct recording and playback in this mode; they require correctly configured audio inputs and outputs.
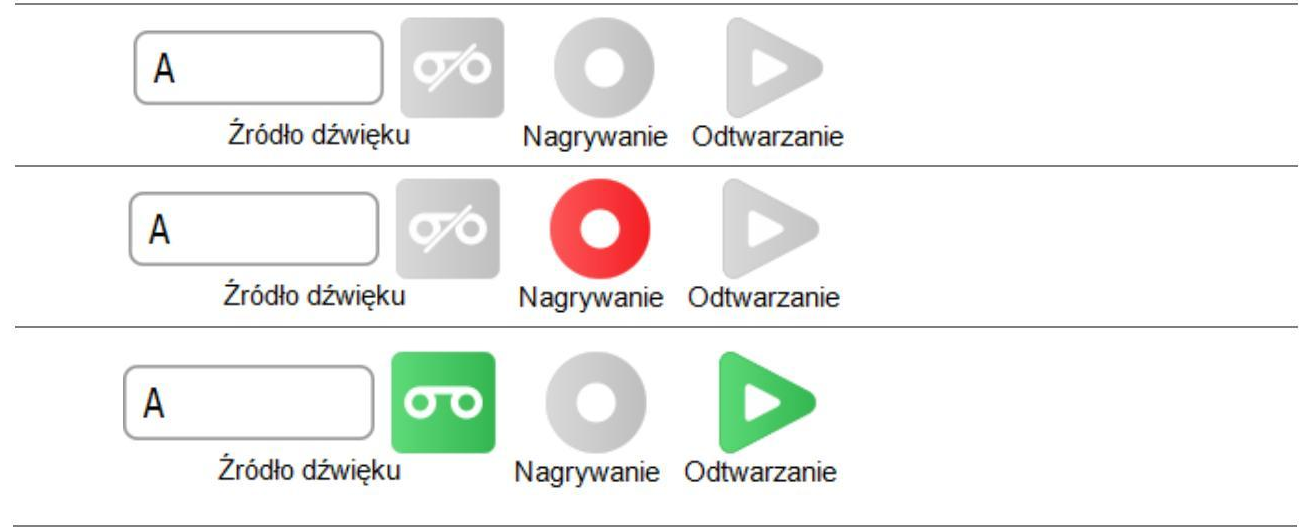
Before recording, agree the purpose, required permissions and storage location. Read the Data Privacy and Storage Policy · PDF. Report configuration problems to the lecturer or Head of the Laboratory.
Teaching ideas for PhonInter Lab
The following are teaching activities for a lecturer to plan.
| Teaching focus | Example use |
|---|---|
| Phonetics and pronunciation | Listen to a short model, practise in pairs, then compare a selected sound, stress pattern or intonation contour. |
| Listening and communication | Assign tasks to groups, hold headset-based discussions and give lecturer feedback. |
| Preparation for interpreting | Listen to a source speech, practise oral reformulation or consecutive interpreting, and review a recording where recording is permitted. |
Features that depend on the package
| Package or mode | What the manual describes |
|---|---|
| TOGETHER | Control from a mobile device, subject to the appropriate licence and configuration. |
| ACCESS | Voice support for visually impaired users, depending on workstation equipment and settings. |
| NOVA / QUEST | Test support in a compatible setup, requiring the separate application and compatible student consoles. |
| AI | A mode for connecting a selected participant to an AI platform; the manufacturer refers to a separate guide for details. |
Confirm which packages are available in Room 205 before planning an activity that depends on them.
Manual and help before your session
Download the full v4.9.5.7 manual · PDF, English machine translation
Mentor ADVANCED on the manufacturer’s website
Arrange an induction with Prof. Yan Kapranov: y.kapranov@vizja.pl. Include your course, the task you want to run and the functions you need.

